
Every password used in an organization is a security hole. The largest ransomware attacks and corporate data breaches have been caused by compromised passwords for noncritical systems that allowed access to critical systems. Requiring that you provide both something you know (your password) and something you have (your phone) makes it harder for your passwords to be compromised.
That’s the definition of multi-factor authentication, or “MFA.” MFA describes a security feature that requires a user to present two or more “factors,” or pieces of information, to prove their identity when logging in to the system. For example, this might look like logging in to Salesforce with your regular username and password, and then using an app on your phone to confirm your login attempt.
This video from Salesforce helps to explain these concepts further: https://www.youtube.com/watch?v=SzfsxtMqygI
Starting February 1, 2022, Salesforce will begin requiring customers to activate MFA protections on their accounts. We are encouraging our clients to take action now and set up the Salesforce Authenticator app to authorize login attempts.
(If access to mobile phones is an unreasonable requirement for your Salesforce users, there are alternatives to using the mobile application; this is the default option we’re recommending for all of our clients, though.)
Here’s how to get started:
1. Download the Salesforce Authenticator App here:
2. Create a permission set called Multi-Factor Authentication and assign the permissions set to yourself
3. Follow the screen prompts to use the Salesforce Authenticator App to log in.
4. Discuss with your fellow staff members, develop a rollout schedule, and assign users the Permission Set you created based on the schedule.
Salesforce has provided a wealth of other information and documentation about this process — here’s a collection of links if you want to dig in and learn more.
- Journey to MFA: Launch Multi-Factor Authentication (a video walks you through all the steps we’ve described above)
- Admin Guide to Multi-Factor Authentication (a slide deck covering the same process, plus some tips about how to ensure success)
- Trailhead Module: Secure Your User’s Identity (earn your badge by following this step-by-step guide to setting up MFA)
- Salesforce Multi-Factor Authentication FAQ (an epically long help document that covers just about anything else you can imagine on this topic!)
What does Authentication mean?
Authentication refers to giving someone identity to access the system.
Users can authenticate through multiple ways. Some of the common ways are:
- Password-Based Authentication. (Ex: Username and Password)
- Token-Based Authentication. (Ex: One-Time Password)
- Certificate-Based Authentication.
- Biometrics.
Once you are logged in to the system, you need the Authorization to access the resources.
What is a Multi-Factor Authentication?
Multi-Factor Authentication is a concept of adding an additional layer of security while you are logging into the system. Multi-Factor authentication decreases the risk of getting into your system by Brute-Forcing using wordlist for password dictionary, Hash Decryption, Phishing Attacks, etc.
Factors are:
- Something you know i.e., USERNAME and PASSWORD.
- Something you have i.e, Phone: Authentication Apps or Security Key Device: Yubico Key.
One of the commonly used MFA tools is Google Authenticator.
Salesforce has also come up with its authenticator app: Salesforce Authenticator.

Key Features of different Authenticator Apps:
Google Authenticator:
- Uses the T-OTP (Time-Based OTP) algorithm for verification.
- Available for multiple Operating Systems.
- Doesn’t require connectivity to authenticate.
Salesforce Authenticator:
- Uses Passcode to connect accounts for the first time and pushes Approve/Deny notifications for verification.
- Available for Android and iOS only.
- Generates TOTP codes if connectivity isn’t available.
- Automates authentication from trusted IP’s.
MFA Verification Using Salesforce Authenticator App
The Salesforce Authenticator mobile app makes MFA easy by integrating into your login process. It’s simple for users to install and connect to their Salesforce accounts.
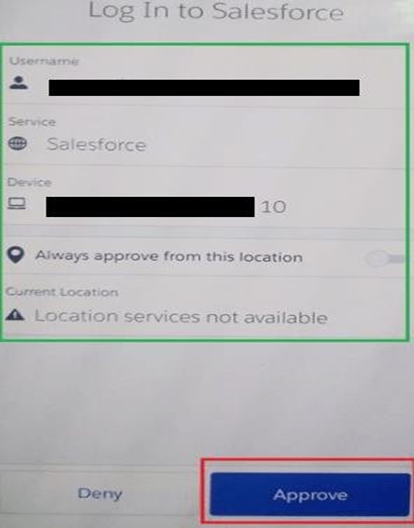
When a user logs in, they get a push notification on their mobile device. The user taps the notification to open Salesforce Authenticator and sees the following information:
- The action that needs to be approved
- Which user is requesting the action
- Which service is requesting the action
- What device the user is using
- The location from which the request is coming with this information can quickly and confidently approve or deny the authorization request. They can also automate the extra authentication step when working from a trusted location.

User Types that support MFA:
- Internal users
An internal user is anyone who has a standard user license and can access your Salesforce org’s UI, including admins, developers, privileged users, standard users, and users authorized to act on your company’s behalf, such as partners and third-party agencies.
- Chatter Only (Chatter Plus) users.
User Types that don’t support MFA:
- External users
An external user is anyone who has a Community, Employee Community, or External Identity license and can only access your company’s Experience Cloud sites, e-commerce sites or storefronts, help portals, or employee communities.
- Chatter External, Chatter Free users.
Ways to Login into the System.
- Using Username and Password.
- Using SSO(Single Sign-On).
What is SSO?
Single Sign-On is an authentication method of login into multiple systems using a link or just by a simple click of a button in your App.
Key-Terms used when you come across SSO:
- Service Provider: The service or system you want to access while you click the link.
- Identity Provider: The system or app from where you click the button to get redirected to your service provider.
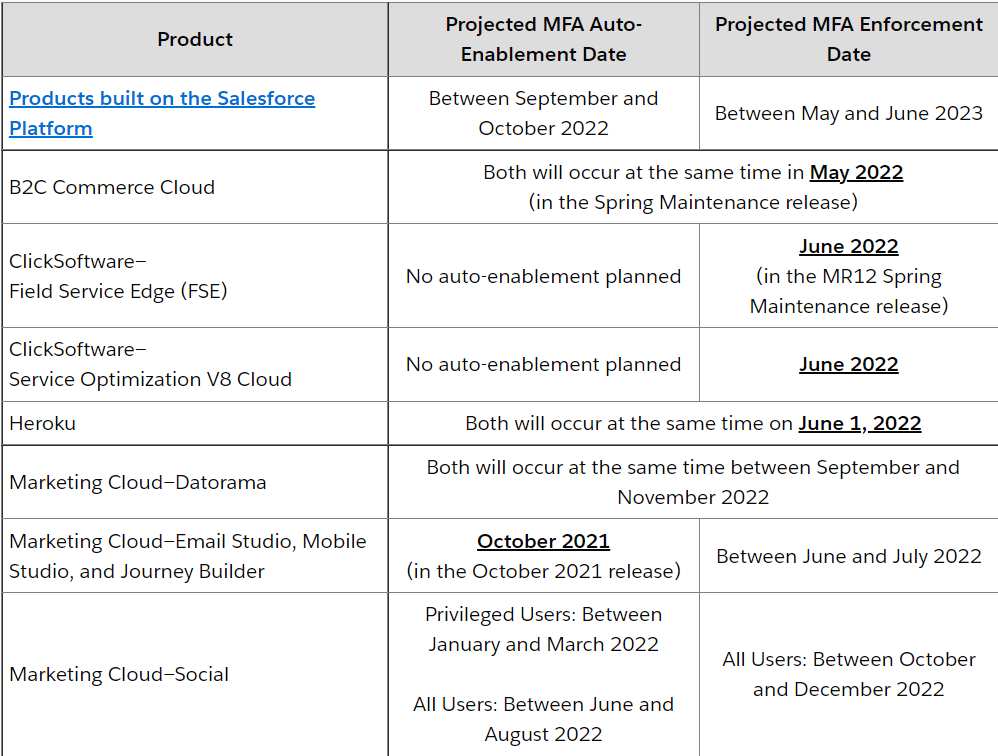
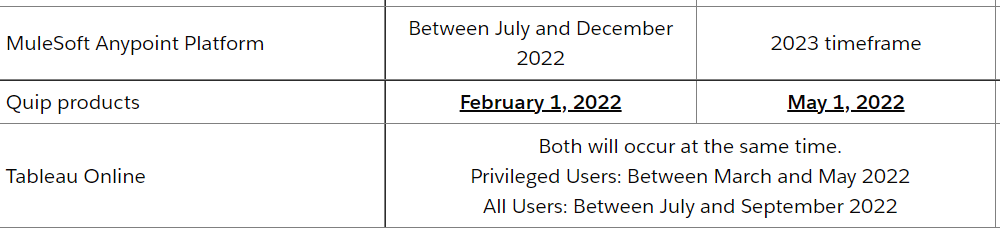
Multi-Factor Authentication (MFA) Enforcement Roadmap
Steps for Implementing MFA Using Salesforce Authenticator App
Step 1: Login into your Salesforce account
Step 2: On the setup page, search “Permission Set.”
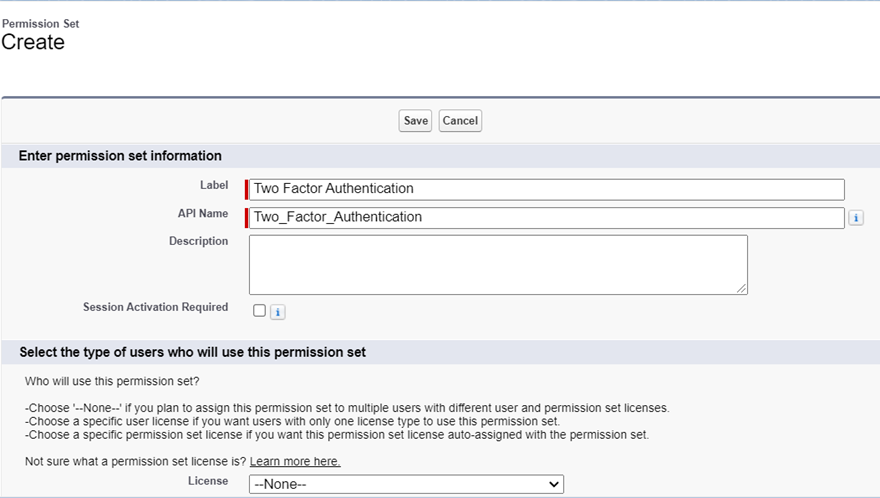
Step 3: Click the “New” button to create a new permission set for the user
- Enter the label name: Two factor Authentication
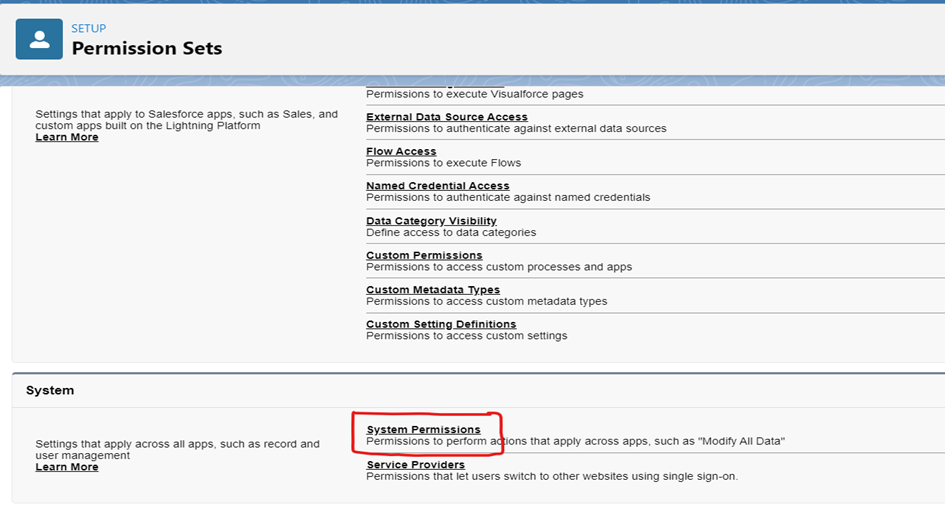
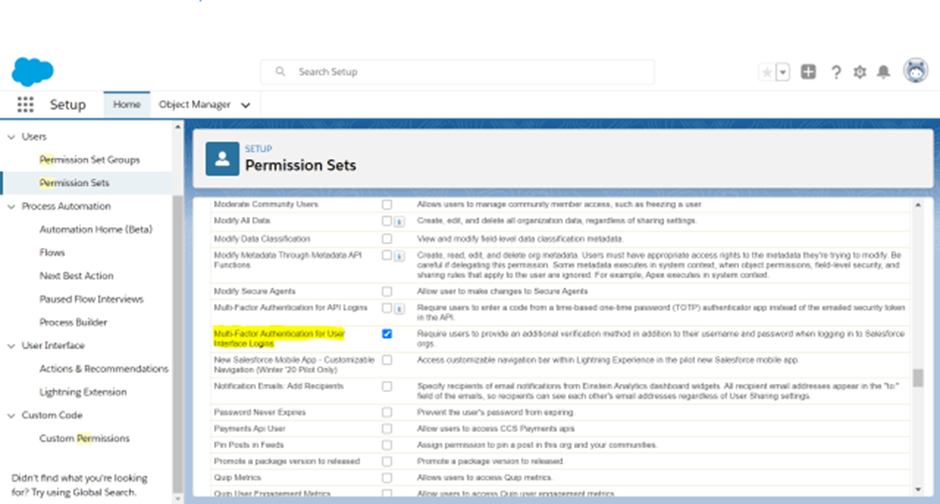
Step 4: After saving, scroll down and click “System Permissions” under the system section in the created permission set. Then click the “Edit” button.
Step 5: Scroll down or search “Multi-Factor Authentication for User Interface Logins” and enable the check box. To save the update, click the “Save” button.
Step 6: Click the “Manage Assignments” button and then click the “Add Assignments” button to add users.

Step 7: Select the user to enable two-factor authentication, then click the “Assign” button.
Step 8: Click the “Done” button and activate the created permission set.
Step 9: Log out of your Salesforce account.
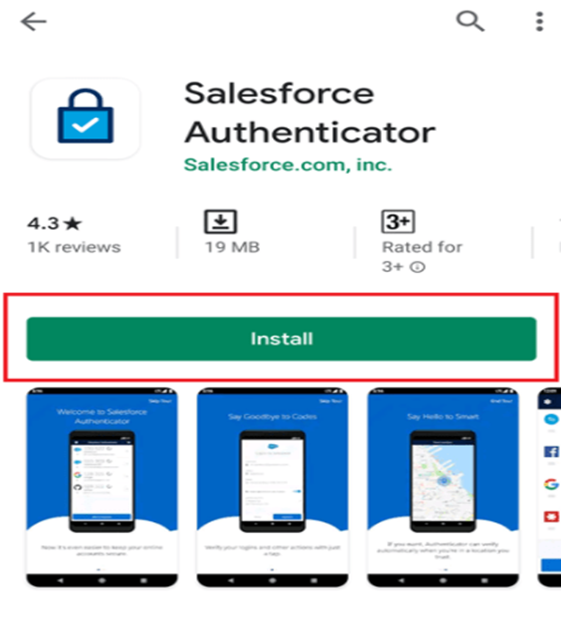
Step 10: Download and install the “Salesforce Authenticator” application from your mobile device’s app market.
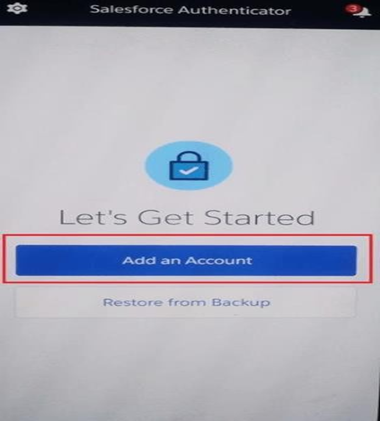
Step 11: Open the “Salesforce Authenticator” app and click “Add an Account.”
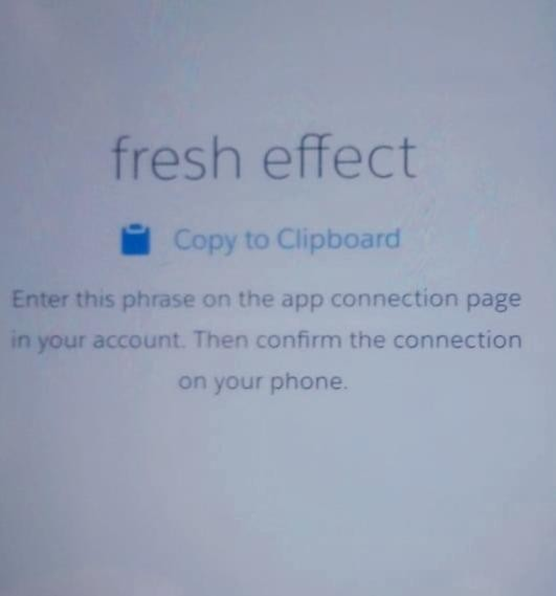
Step 12: On your mobile device, the app displays a two-word phrase authenticator. Keep this word on your mobile device.
Step 13: Log in to the Salesforce account that created the permission set.

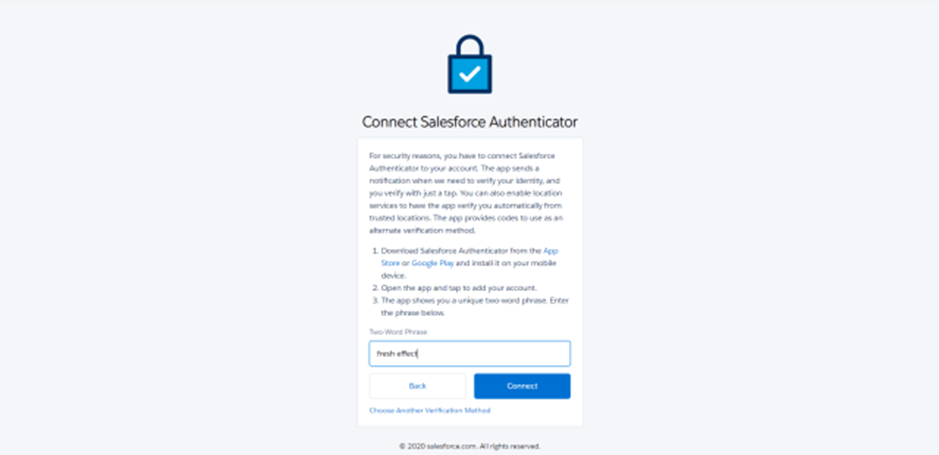
Step 14: After clicking on the login button, the “Connect Salesforce Authenticator” page will be opened.
Enter the two-word phrase from the Salesforce Authenticator application and then click the “Connect” button.
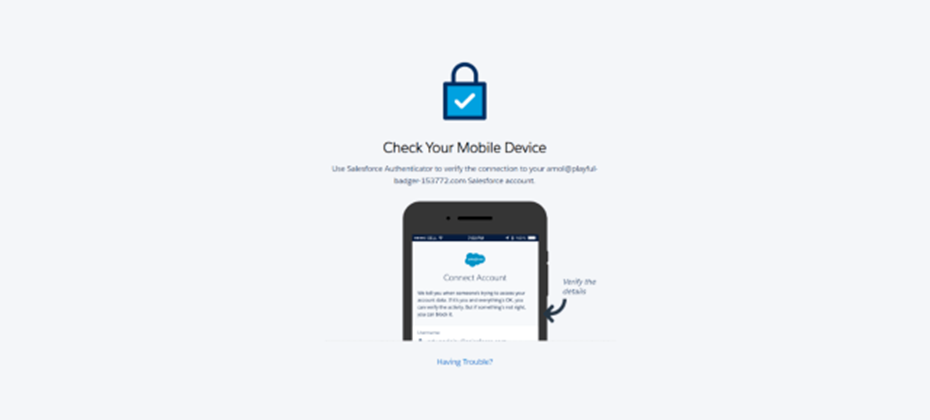
Step 15: Now, check your Salesforce Authenticator app; it will prompt you to connect with the authenticator.
Click on the “Connect” button.
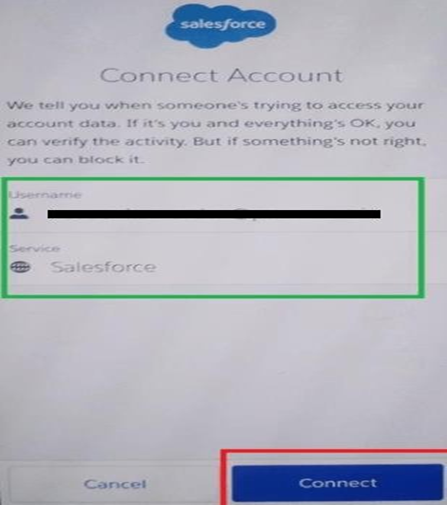
Step 16: Your mobile device now displays your username and service name.
Check the details after clicking the “Connect” button on your mobile device.
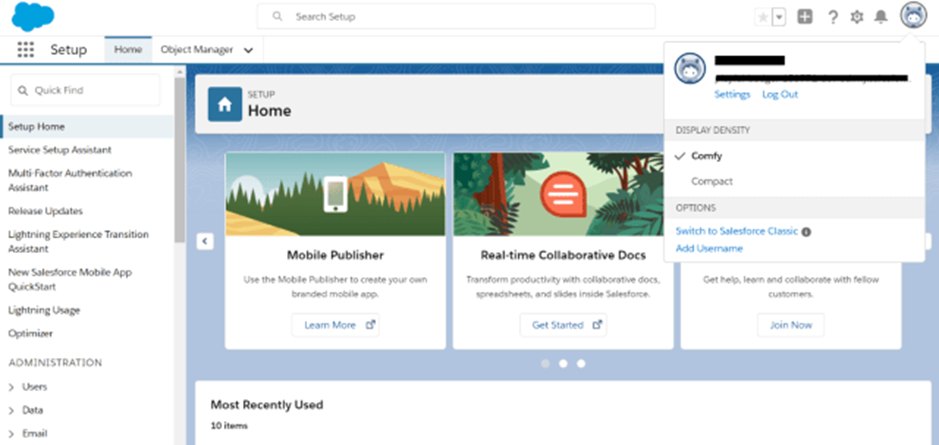
Step 17: If successfully connected, you’ll be automatically redirected to your Salesforce account’s main page.
You can log out of this session to test your multi-factor authentication.
Step 18: Again, enter your login credentials and then click the “Login” button.
Step 19: Check your Salesforce Authenticator app; it will prompt you to approve this log in or not.
Click the “Approve” button to approve this login session.
Step 20: Your login is approved; you’ll be automatically redirected to your Salesforce account’s main page.
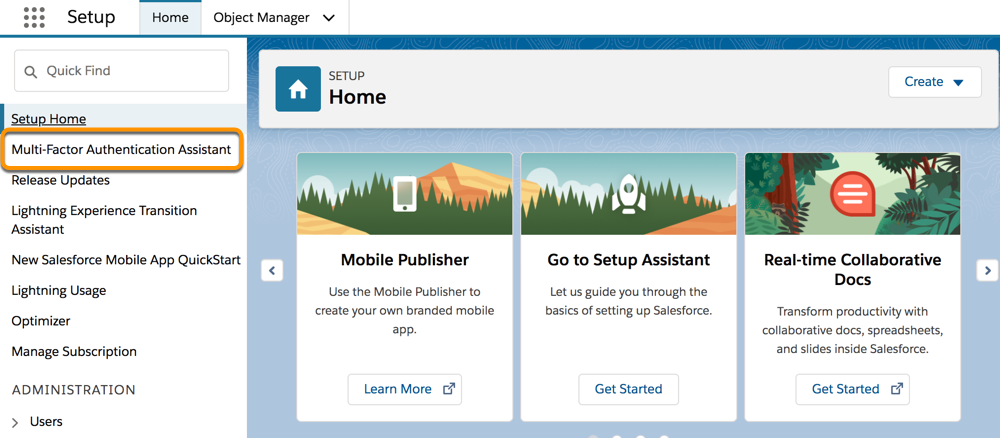
Multi-Factor Authentication Assistant
Looking for help rolling out multi-factor authentication (MFA) to your Salesforce users? Meet the Multi-Factor Authentication Assistant, your central hub for all the recommended activities, tools, and resources for a successful project.
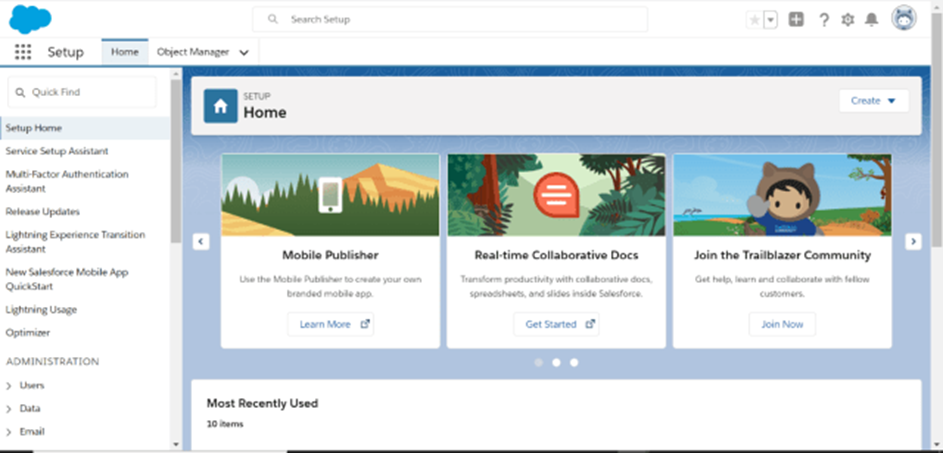
The Multi-Factor Authentication Assistant is available from Setup in Lightning Experience.
The Multi-Factor Authentication Assistant guides you through each phase and stage on the path to MFA.
- Get Ready phase: Kick off your multi-factor authentication (MFA) project with a discovery and planning period.
- Roll Out phase: Prepare your users for MFA with change management activities, work through your implementation and test plans, then go live.
- Manage phase: Measure the effectiveness of your MFA rollout, support users with ongoing, day-to-day operations, and optimize your MFA implementation and overall security posture.
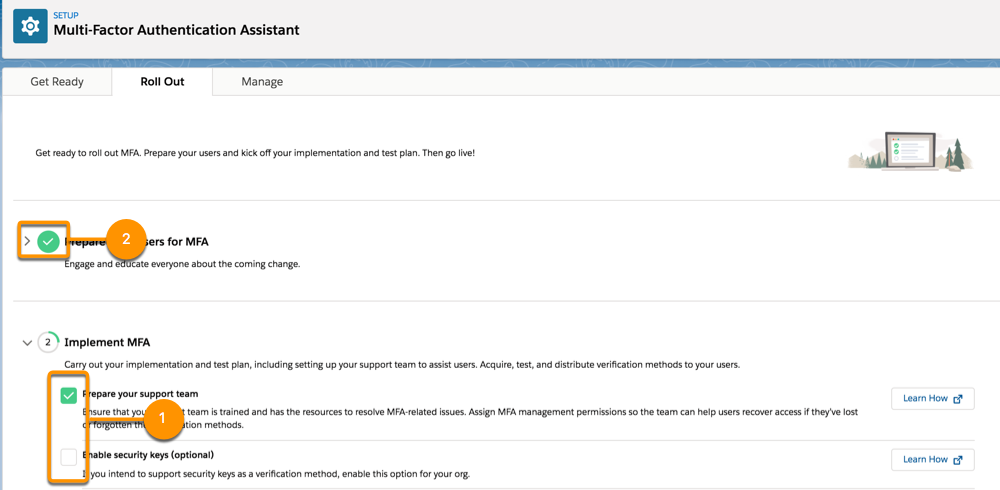
In each phase, you get support with step-by-step instructions and resources. Activities are grouped into a series of stages that keep you organized and help you track your progress. To see the recommended activities in a stage, click the  icon.
icon.
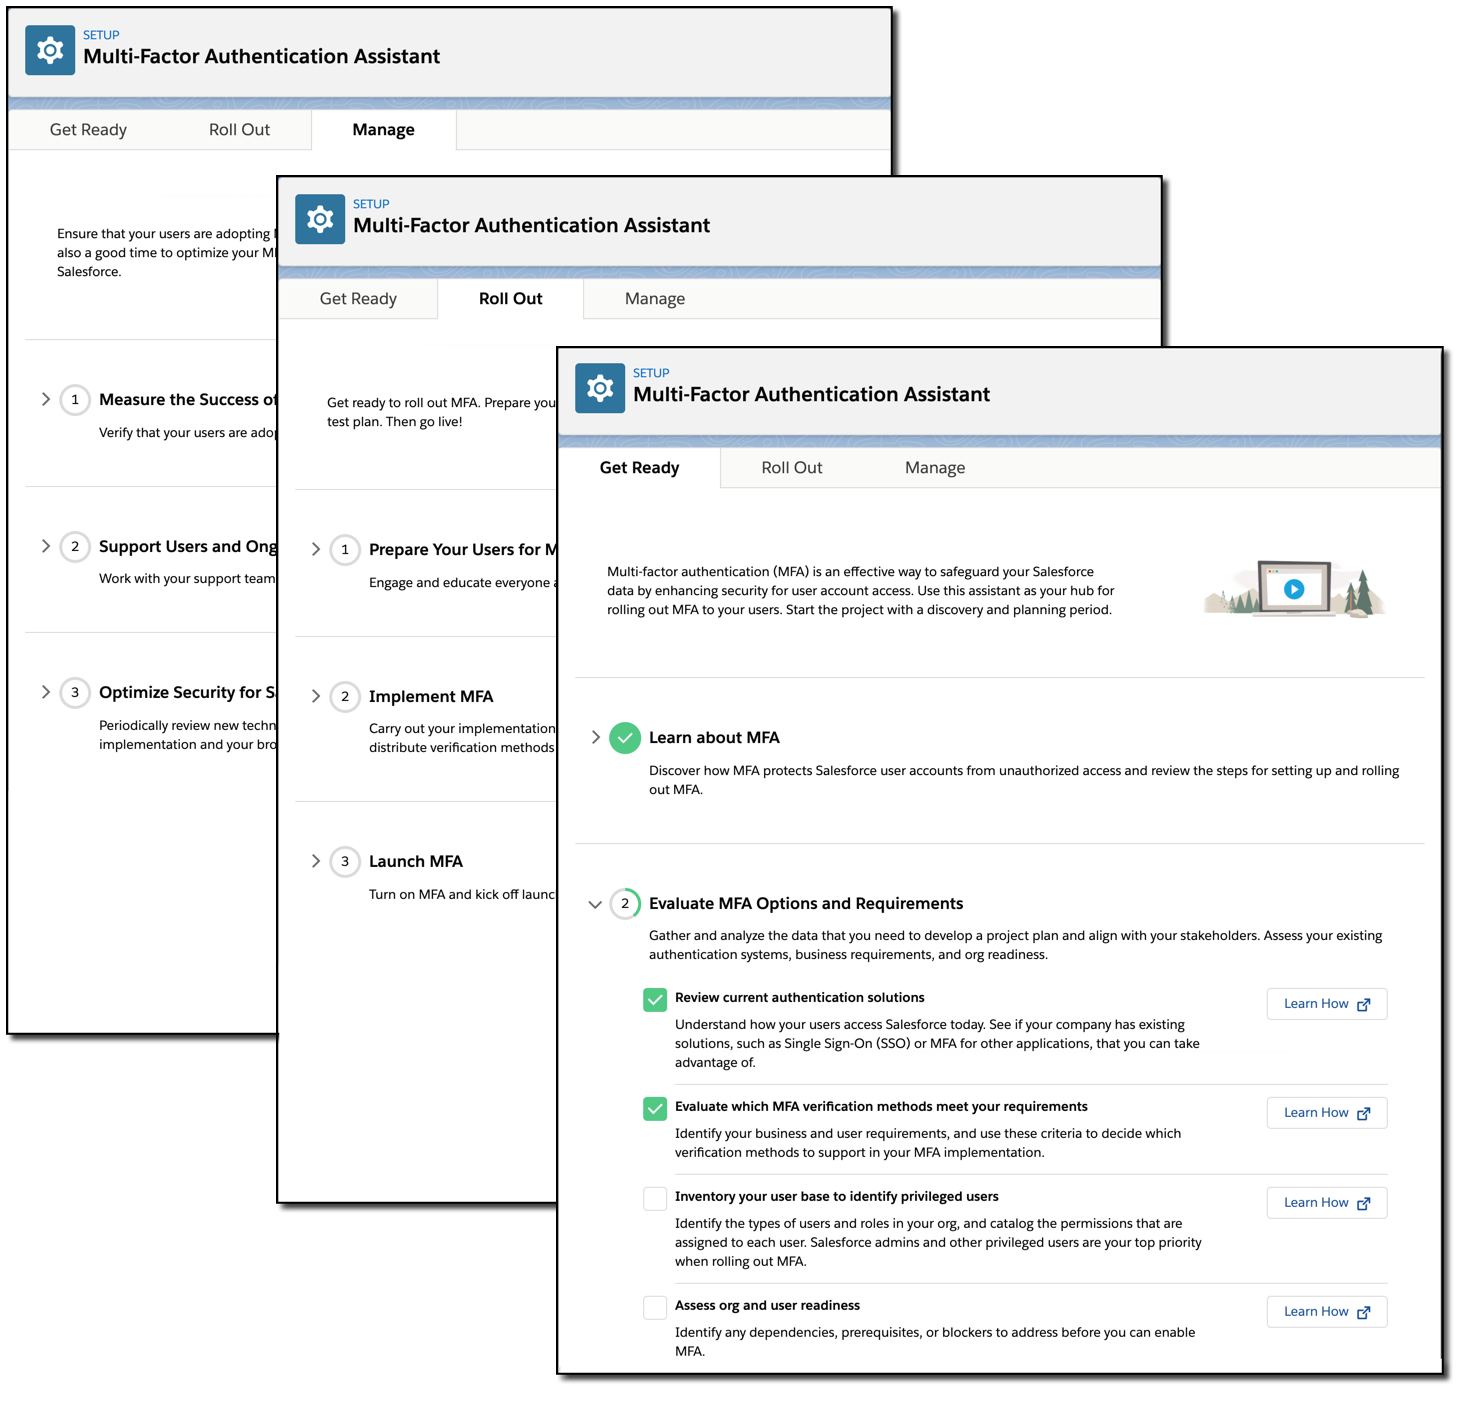
The Assistant helps you keep track of the work you’ve finished and where you’ve left off by allowing you to check off steps that you’ve completed (1). The Assistant shows when you’ve completed all steps in a stage (2).
The Multi-Factor Authentication Assistant is designed to move you quickly and efficiently through the process. But you can tackle activities in whatever order makes sense for your org. And you can skip any steps that aren’t relevant or don’t add value to your project. If you take an iterative approach to rolling out MFA, you can repeat activities until you’ve enabled all users.
Salesforce Multi-Factor Authentication FAQ
MFA Essentials
Requirement to Enable MFA
- Is Salesforce requiring customers to enable MFA?
- Why is Salesforce requiring MFA?
- When does the MFA requirement go into effect?
- How will the MFA requirement affect users on February 1, 2022?
- How can we verify that our MFA implementation satisfies the MFA requirement?
- Is it necessary to certify that our MFA implementation satisfies the MFA requirement?
- What happens if we can’t meet the MFA requirement deadline?
Scope of the MFA Requirement
- Which user, login, and environment types require MFA?
- Is MFA required for single sign-on (SSO)?
- Is MFA required for customer and partner Experience Cloud sites?
- Do mobile and desktop app logins require MFA?
- Is MFA required for sandbox environments?
- Is MFA required for RPA or automated testing accounts?
- Do Salesforce subscriptions with a partner require MFA?
- Is MFA required for product trials?
- Does risk-based/continuous authentication meet the MFA requirement?
- Do trusted corporate devices meet the MFA requirement?
- Does restricting logins to trusted networks meet the MFA requirement?
- Does using VPN satisfy the MFA requirement?
- Do user certificates meet the MFA requirement?
- Can we use a password manager as an alternative to MFA?
- Are there any products that are excluded from the MFA requirement?
- Do we have to use the same MFA solution for all our Salesforce users?
MFA for Direct Logins to Salesforce Products
- Which Salesforce products support MFA?
- How will Salesforce enforce MFA for Salesforce products?
- How will Salesforce exclude MFA-exempt user types from auto-enablement and enforcement?
- Is Lightning Login a form of MFA?
- Can we use a third-party MFA solution?
- What is Device Activation and how is it related to MFA?
MFA for SSO Logins to Salesforce Products
- Does SSO satisfy the MFA requirement?
- Why is Salesforce requiring MFA for SSO?
- Do we have to enable MFA at both the SSO and Salesforce levels?
- How frequently should users provide an MFA verification method when logging in to our SSO portal?
- How will Salesforce know if we’ve enabled MFA for our SSO IdP?
- Will Salesforce enforce MFA for SSO?
- Can we enable MFA in Salesforce instead of using our SSO provider’s MFA service?
- Can we enable SSO for Salesforce admins?
- How can we enforce SSO logins for Salesforce users?
- What should we do if SSO goes down and users need to log in directly to Salesforce products?
Verification Methods for MFA
- Which verification methods satisfy the MFA requirement?
- Can users register multiple verification methods?
- Can we use email, SMS, or phone calls as MFA verification methods?
- What is Salesforce Authenticator?
- What are third-party TOTP authenticator apps?
- What is a security key?
- What are built-in authenticators?
- Can we use desktop or browser-based TOTP authenticators?
- Does Salesforce support TOTP codes from a password manager?
- What happens if no supported MFA verification methods work for us?
- Our users don’t have mobile devices. Can we still use MFA?
- Is a data connection needed to use a mobile authenticator app?
MFA User Experience
- How are my users affected when we enable MFA?
- How frequently must users provide a verification method when logging in directly?
- Can I automate or control the frequency of the MFA verification step?
- How can users recover access if they don’t have their verification method?
- How can we keep admins from getting locked out when MFA is enabled?
- Does MFA affect the Log In As Another User option?
Roll Out MFA
- How do I turn on MFA for our Salesforce products?
- Can we turn on MFA for privileged users only?
- Can we enable MFA if users are sharing a Salesforce account?
- How do I prepare my users for MFA?
- How does MFA work in sandbox environments?
Learn More
Blog Content References: https://help.salesforce.com/s/articleView?id=000352937&type=1
Regards,
Jayakrishna
